Semlor

Swedish lenten buns

I based this recipe for semlor on one that Karin Jonsson very kindly shared with us, after we spent far too long admiring photographs of her semlor (the plural of semla) online. Karin is a Swedish chef and baker who runs a beautiful bakery in Orkney, the Orkney Sourdough Co. We have been hoping to make a trip up to visit Orkney for some time, but since we can’t make it to her bakery at present, we decided to try making these delicious buns at home instead! These Swedish lenten buns are a Shrove Tuesday tradition, but I gather they are also enjoyed in general starting from around January and up until Easter.

Check the instructions for the type of dried yeast you are using – some types of dried yeast need to be added to liquid to activate them, others are designed to go straight into the dry ingredients with the flour and will not work if added to liquid first. Having got this the wrong way round myself in the past and killed all the yeast off (resulting in disappointingly flat buns) I’m speaking from experience here!

Thank you so much Karin for helping us to make semlor and sharing your knowledge with us. Karin recommends a strong white bread flour, she uses our No. 4. Her other piece of key advice is these buns must be enjoyed immediately while fresh! Once you’ve filled them don’t store them in the fridge. If you have more buns than you need you can freeze them, and then defrost when you want to make a fresh semla.

I have adapted the original recipe a little into the below, to be made in a home kitchen. This version makes 15-18 buns.

A brief note on hydration – Karin’s original recipe creates a very soft, high-hydration dough, so if you are not used to handling these or would like to create a firmer dough I would recommend scaling the milk down to about 325g milk (65% hydration) and working up from there if you want to. Feel free to adapt hydration to your own personal preferences.

INGREDIENTS

  • 500g whole milk
  • 150g butter, cubed
  • 100g caster sugar
  • ½ tsp freshly crushed cardamom seeds
  • 14g active dried yeast
  • 500g white bread flour (plus an extra 100g for dusting / reserve)
  • pinch salt
  • FOR THE FILLING
  • 230g marzipan, grated
  • 40g flaked almonds
  • 2 tbsp milk
  • 300ml whipping cream
  • 1 tsp icing sugar, plus extra for dusting
  • TO GLAZE
  • cream / beaten egg/ milk

METHOD

Over a medium heat, warm the milk and melt the butter into it until just turned liquid. Pour in the caster sugar and dissolve, followed by the crushed cardamom. It should be tepid in temperature, not hot.

Add the dried yeast if it needs to be added to liquid and leave to sit for a couple of minutes (or according to yeast packet instructions; it may need to go in with the flour instead).

In a large mixing bowl, weigh out the flour and salt.

Add the melted butter and milk mixture to your flour and combine thoroughly. If you have a stand mixer with a dough hook this is the easiest way of kneading the dough with least mess. I don’t currently have one and so knead by hand.

I start by kneading it in the bowl as it is a very soft and liquid dough. Then, tip your dough out on to a lightly oiled work surface and knead until smooth (I find the slap and fold technique for wet doughs the easiest way to handle this dough. You need to be quick with your motions when you’re kneading otherwise it will get stuck to the surface).

The dough starts out extremely soft and sticky but it will become more elastic and start pulling away from your work surface after enough kneading (this takes me 10-15 minutes). Use a dough scraper to keep bringing the dough back under control. You may have moments where you think it’s not going to come together but with plenty of kneading it will do! If you need to add some of the reserve flour do so, gradually.

Place the dough in a lightly oiled bowl, cover, and leave it to rest until doubled in size (1-2 hours).

Line 3 baking trays with baking parchment.

Tip your dough out onto a lightly floured work surface and knead very briefly. Divide the dough into 15-18 buns (roughly 65g each, or 80g if you want to make a larger bun). Shape into tight rounds, and place on the baking trays with plenty of space between them. Cover and leave to prove for 1-2 hours, until they have risen nicely. If your house is cold, I sometimes make a type of home prover by covering them with a large plastic bag and placing a jug of hot water inside the bag with them, to create a warm atmosphere.

Preheat your oven to 230°C.

Brush your glaze over the buns, and bake for 8-12 minutes, until golden and cooked through. Keep an eye on them to make sure they don’t burn. Leave them to cool on a wire rack.

Cut off a triangle shaped lid from each bun.

While they finish cooling, make your filling. Lightly toast the flaked almonds dry in a saucepan over a medium heat just until they start to turn a little golden. In a mixing bowl, combine these with the grated marzipan, and a couple of tablespoons of milk to loosen it up. Leave it to sit and absorb.

Whip your cream until fluffy, adding a teaspoon of icing sugar for just a touch of extra sweetness.

When the buns have cooled, scoop out approximately one third of the insides. You can tear this up and add to the filling if you like.

Place a couple of generous teaspoons of the almond paste filling in each of the buns, followed by piping whipped cream on top using a piping bag.

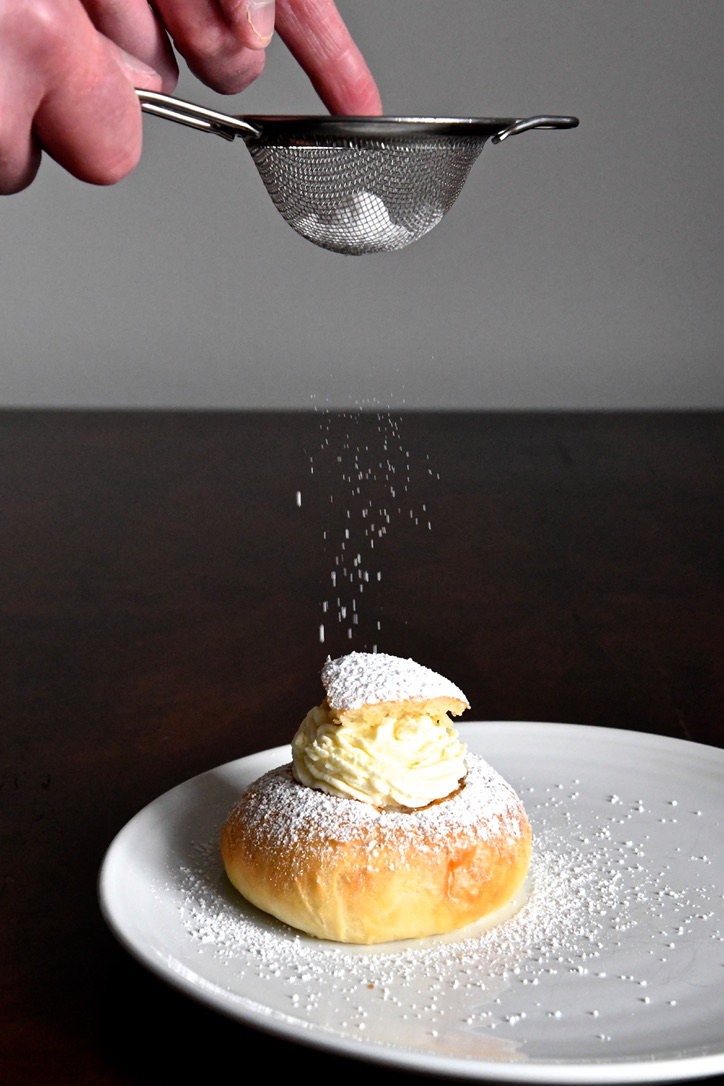
Place the lids carefully back on the tops and dust with icing sugar.

Enjoy fresh.

AF6B08FD-31CA-40EB-B744-B1DE140AD4B8_1_105_c